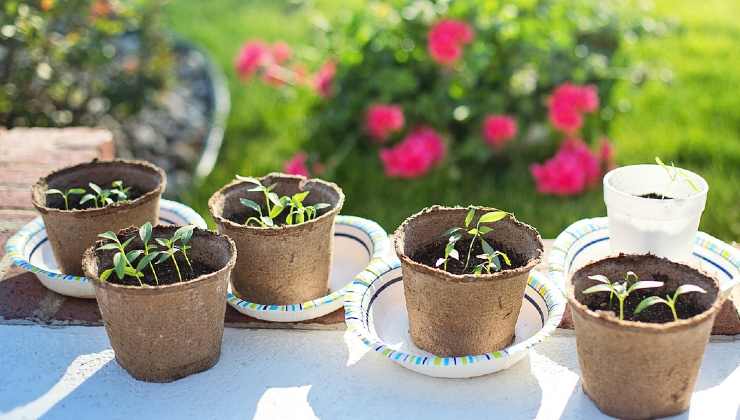
Why Hyssop is the Best Herb to Grow in Your Garden🌱

Why Hyssop is the Best Herb to Grow in Your Garden🌱

Hyssop (Hyssopus officinalis) is a versatile and aromatic herb that has been cherished for centuries for its culinary, medicinal, and ornamental uses. Its hardy nature, beautiful flowers, and multitude of benefits make it an excellent addition to any garden. Here are the top reasons why hyssop is the best herb to grow in your garden.

1. Beautiful and Attractive Blooms

Hyssop produces spikes of vibrant, tubular flowers in shades of blue, purple, pink, or white that are not only visually appealing but also attract pollinators. Bees, butterflies, and hummingbirds are particularly drawn to hyssop, making it a fantastic choice for a pollinator-friendly garden. Its long blooming season—from midsummer to early fall—adds continuous color to your landscape.

2. Easy to Grow and Maintain

One of the greatest advantages of hyssop is its low-maintenance nature. Hyssop thrives in a variety of conditions and is drought-tolerant once established. It prefers full sun and well-draining soil but can adapt to less-than-ideal conditions. Whether you’re a seasoned gardener or a beginner, hyssop’s resilience makes it an easy and rewarding plant to grow.

3. Culinary Versatility

Hyssop is not just an ornamental plant; it also has a variety of culinary uses. Its leaves have a bold, minty flavor with hints of bitterness, making them a unique addition to salads, soups, and marinades. Hyssop can be used fresh or dried to flavor meats, vegetables, and even liqueurs, adding a distinct and aromatic touch to your dishes.

4. Medicinal Benefits

Historically, hyssop has been valued for its medicinal properties. It has been used to treat respiratory issues, digestive problems, and as an antiseptic. Hyssop tea is often consumed to relieve symptoms of colds and coughs, thanks to its natural anti-inflammatory and antimicrobial properties. While you should always consult with a healthcare professional before using herbs medicinally, hyssop’s long history in traditional medicine speaks to its many potential benefits.

5. Repels Pests Naturally

Hyssop is a natural pest repellent, making it an ideal companion plant in your garden. Its strong scent helps deter common pests like aphids, cabbage moths, and flea beetles. Planting hyssop alongside vegetables or other herbs can help protect your crops without the need for chemical pesticides, promoting a healthier and more sustainable garden.

6. Perennial and Long-Lived

Hyssop is a hardy perennial, meaning it will return year after year with minimal effort on your part. This longevity makes it a great investment for your garden, providing beauty, fragrance, and utility for many seasons. With proper care, hyssop can thrive for several years, making it a reliable and long-lasting addition to your herb garden.

7. Compact and Versatile

Hyssop’s compact size makes it perfect for various garden settings. Whether you’re planting in traditional garden beds, herb gardens, or containers, hyssop adapts well to its surroundings. Its tidy growth habit means it won’t overwhelm other plants, making it an excellent choice for smaller spaces or mixed plantings.

Final Thoughts

Hyssop stands out as the best herb to grow in your garden due to its beautiful flowers, ease of care, culinary and medicinal uses, natural pest-repelling properties, and long-lived nature. Whether you’re seeking to attract pollinators, add flavor to your cooking, or simply enjoy a low-maintenance plant, hyssop is a versatile herb that will reward you with its many benefits. Embrace the charm and practicality of hyssop, and watch it become a beloved part of your garden for years to come.

DIY Recycled Trellis Ideas For Your Garden🌱

DIY Recycled Trellis Ideas For Your Garden🌱

A garden trellis provides essential support for climbing plants, helps save space, and adds a touch of creativity to your garden. By using recycled materials, you can create functional and eco-friendly trellises that are both unique and sustainable. Here are some inspiring DIY recycled trellis ideas to try in your garden.

1. Old Bed Frame Trellis

  • Materials: An old metal or wooden bed frame.
  • Steps:
    • Remove the headboard and footboard from an old bed frame.
    • Position the frame vertically or horizontally in your garden.
    • Secure it in place by digging it into the soil or attaching it to a wall or fence.
  • Benefits: The sturdy frame is perfect for supporting heavy plants like cucumbers or beans, and the intricate designs on some bed frames can add a vintage charm to your garden.

2. Recycled Bicycle Wheel Trellis

  • Materials: Old bicycle wheels.
  • Steps:
    • Gather several old bicycle wheels.
    • Arrange them in a circular or vertical pattern, connecting them with wire or rope.
    • Secure the structure by attaching it to a wooden post or fence.
  • Benefits: The spokes of the wheels provide a ready-made grid for plants to climb, and the circular design adds a whimsical touch to your garden.

3. Wooden Crate Trellis

  • Materials: Recycled wooden crates.
  • Steps:
    • Disassemble the crates to create slats or use the crates as is.
    • Stack or arrange them in a trellis shape and secure them together with nails or screws.
    • Position the trellis in your garden, securing it into the soil or against a structure.
  • Benefits: Wooden crates are easy to find and provide a rustic, farmhouse look while offering sturdy support for climbing plants.

4. Ladder Trellis

  • Materials: An old wooden or metal ladder.
  • Steps:
    • Repurpose an old ladder by placing it upright in your garden.
    • Lean it against a wall or secure it into the ground for stability.
    • Use the rungs as support for climbing plants.
  • Benefits: An old ladder makes an ideal trellis for lightweight plants like peas and beans and adds vertical height to your garden.

5. Recycled Window Frame Trellis

  • Materials: Old window frames.
  • Steps:
    • Remove the glass panes from old window frames.
    • Attach several frames together to create a larger trellis structure or use a single frame.
    • Secure the frame to a wall, fence, or directly into the ground.
  • Benefits: Recycled window frames are perfect for adding character to your garden while providing support for climbing flowers or vegetables.

6. Wire Hanger Trellis

  • Materials: Old wire hangers.
  • Steps:
    • Straighten out old wire hangers.
    • Twist and shape them into a trellis form, such as an arch or grid.
    • Secure the trellis in the ground or attach it to a support structure.
  • Benefits: Wire hangers are easy to shape and can be transformed into creative and intricate trellis designs for lightweight plants like sweet peas or vining flowers.

7. Pallet Trellis

  • Materials: Recycled wooden pallets.
  • Steps:
    • Stand a wooden pallet upright in your garden.
    • Secure it into the ground or lean it against a fence or wall.
    • Allow climbing plants to grow up the pallet slats.
  • Benefits: Wooden pallets are often readily available for free and can be quickly transformed into a simple yet effective trellis.

Conclusion

By using recycled materials, you can create a variety of DIY garden trellises that are not only functional but also environmentally friendly. Whether it’s an old ladder, bicycle wheels, or window frames, these creative trellis ideas will enhance your garden’s aesthetic while supporting your climbing plants. Embrace sustainability and add a personal touch to your garden with these recycled trellis projects.

12 Homemade fertilizers for plants easy to find at home🌱

12 Homemade fertilizers for plants easy to find at home🌱

Boosting your plants’ health and vitality doesn’t always require a trip to the store. In fact, you can create effective homemade fertilizers using common household items. Here are 12 easy-to-find ingredients that can nourish your plants and promote robust growth:

  1. Banana Peels: Rich in potassium, banana peels can be chopped up and buried around plants or soaked in water to create a potassium-rich fertilizer.
  2. Coffee Grounds: Used coffee grounds are excellent for acid-loving plants like tomatoes and roses. Simply sprinkle them around the base of your plants or mix them into the soil.
  3. Eggshells: Crushed eggshells are a great source of calcium for plants. Rinse and dry them, then grind them into a fine powder and sprinkle around your plants or add them to your compost.
  4. Epsom Salt: Dissolve Epsom salt in water and use it to water your plants. It provides magnesium, which is essential for healthy plant growth.
  5. Molasses: Dilute molasses in water to create a nutrient-rich fertilizer that provides essential minerals and encourages microbial activity in the soil.
  6. Aquarium Water: Used aquarium water is full of beneficial nutrients like nitrogen, phosphorus, and potassium. Use it to water your plants for a nutrient boost.
  7. Wood Ash: Wood ash from your fireplace or wood stove is a good source of potassium and calcium. Sprinkle it sparingly around plants, especially those that prefer alkaline soil.
  8. Gelatin: Dissolve unflavored gelatin in water and use it to water your plants. Gelatin contains nitrogen, which promotes leafy growth.
  9. Milk: Mix equal parts milk and water and use it to water your plants. Milk provides calcium and protein, which can help prevent blossom end rot in tomatoes and peppers.
  10. Seaweed: Rinse seaweed to remove excess salt and chop it up before adding it to your compost pile or using it as a mulch around plants. Seaweed contains trace minerals and growth hormones that benefit plants.
  11. Vegetable Scraps: Boil vegetable scraps in water to create a nutrient-rich broth that can be used as a fertilizer for your plants.
  12. Weed Tea: Steep weeds like nettles or comfrey in water to create a nutrient-rich tea that can be used to fertilize plants.

With these simple homemade fertilizers, you can give your plants the nutrients they need to thrive without breaking the bank or relying on store-bought products. Experiment with different ingredients and see what works best for your garden!

Sprouting tomatoes in 5 days at home : Sowing, planting and growing tomatoes)🌱

Sprouting tomatoes in 5 days at home : Sowing, planting and growing tomatoes)🌱

Growing your own tomatoes at home can be incredibly rewarding, especially when you see them sprout in just 5 days! Follow these steps for a successful start to your tomato-growing journey.

Materials Needed:

  • Tomato seeds
  • Seed trays or small pots
  • Seed starting mix
  • Clear plastic wrap or a humidity dome
  • Spray bottle
  • Larger pots or a garden bed
  • Watering can
  • Tomato cages or stakes

Step-by-Step Guide:

1. Sowing Tomato Seeds

Prepare Seed Trays:

  • Fill seed trays or small pots with seed starting mix. Ensure the mix is moist but not waterlogged.

Plant Seeds:

  • Sow the tomato seeds about 1/4 inch deep into the soil. Space them at least 1 inch apart if using seed trays.

Cover and Create Humidity:

  • Cover the trays with clear plastic wrap or a humidity dome to retain moisture and warmth, which are crucial for quick germination.

Place in a Warm Location:

  • Place the trays in a warm area with temperatures between 70-80°F (21-27°C). A sunny windowsill or atop a refrigerator works well.

2. Sprouting and Early Care

Monitor Moisture:

  • Check the soil daily and use a spray bottle to keep it evenly moist. Avoid overwatering as it can cause seeds to rot.

Remove Cover After Sprouting:

  • Tomato seeds typically sprout within 5-7 days. Once you see sprouts, remove the plastic cover to prevent mold and mildew.

3. Planting Tomato Seedlings

Transplant Seedlings:

  • When the seedlings have two sets of true leaves, they are ready to be transplanted. Fill larger pots or prepare a garden bed with nutrient-rich soil.

Harden Off Seedlings:

  • Gradually expose the seedlings to outdoor conditions over a week. Start with a few hours of indirect sunlight, gradually increasing exposure to direct sunlight.

Planting in the Garden:

  • Dig holes deep enough to bury the seedlings up to their first set of leaves. This encourages a stronger root system. Space plants about 18-24 inches apart.

4. Growing and Caring for Tomato Plants

Water Regularly:

  • Keep the soil consistently moist but not waterlogged. Water at the base of the plant to avoid wetting the leaves, which can lead to disease.

Support the Plants:

  • Install tomato cages or stakes to support the plants as they grow. This helps keep the fruit off the ground and prevents the plants from breaking.

Fertilize:

  • Use a balanced fertilizer or compost to provide essential nutrients. Follow the instructions on the fertilizer package for proper application rates.

5. Harvesting Tomatoes

Watch for Ripening:

  • Tomatoes are ready to harvest when they reach full color and are firm but slightly soft to the touch.

Pick Regularly:

  • Regular harvesting encourages the plant to produce more fruit. Twist gently to remove the tomatoes from the vine.

Tips for Success:

  • Choose the Right Variety: Select tomato varieties suited to your climate and growing conditions.
  • Control Pests: Monitor for pests such as aphids and tomato hornworms. Use organic pest control methods as needed.
  • Prune as Needed: Prune the lower leaves to improve air circulation and reduce disease risk.
  • Mulch: Apply mulch around the base of the plants to retain moisture and suppress weeds.

By following these steps, you can enjoy the satisfaction of sprouting tomatoes in just 5 days and nurturing them into productive, healthy plants.

How to use Egg shells as fertilizer Eggshells can be a great source of calcium and other minerals for your plants, and they can also help to deter pests such as slugs and snails.🌱

ANY HOUSE PLANT WILL FLOURISH UNINTERRUPTEDLY WITH THIS NATURAL FERTILIZER🌱

House plants bring life and beauty to our indoor spaces, but keeping them healthy and thriving can sometimes be a challenge. Fortunately, there’s a simple, natural solution that can help your house plants flourish continuously: eggshells. This everyday kitchen waste can be transformed into an effective and eco-friendly fertilizer. Here’s how you can use eggshells to boost the health of your house plants.

Benefits of Using Eggshells

  1. Nutrient-Rich:
    • Eggshells are packed with calcium, which strengthens cell walls and supports overall plant health.
    • They also contain small amounts of potassium and magnesium, essential for plant growth.
  2. Eco-Friendly:
    • Utilizing eggshells reduces kitchen waste and reliance on chemical fertilizers.
  3. Soil Improvement:
    • Eggshells help improve soil structure and drainage, promoting healthier root systems.

Materials Needed

  • Eggshells (from raw or cooked eggs)
  • Mortar and pestle or blender
  • Container for storage
  • Watering can

Step-by-Step Guide

  1. Collecting and Preparing Eggshells:
    • Rinse the eggshells thoroughly to remove any residual egg white or yolk.
    • Allow the shells to dry completely, either by air-drying or placing them in a low oven for a few minutes.
  2. Crushing the Eggshells:
    • Once dry, crush the eggshells into a fine powder using a mortar and pestle or a blender. The finer the powder, the more quickly it will release nutrients into the soil.
  3. Storing the Eggshell Powder:
    • Store the crushed eggshells in a sealed container until you’re ready to use them.
  4. Applying Eggshell Fertilizer:
    • Mix with Soil: When repotting plants, mix a few tablespoons of the eggshell powder into the potting soil. This helps incorporate calcium and other nutrients directly into the root zone.
    • Top Dressing: Sprinkle the eggshell powder on the soil surface around existing plants. Lightly scratch it into the top layer of soil to help it integrate better.
    • Watering Solution: For an immediate nutrient boost, steep a handful of crushed eggshells in water overnight. Strain the mixture and use the eggshell-infused water to irrigate your plants.

Additional Tips for House Plant Care

  1. Light:
    • Ensure your plants receive the right amount of light for their specific needs, whether it’s bright indirect light or low light conditions.
  2. Watering:
    • Water your plants consistently, allowing the soil to dry out slightly between waterings to prevent root rot.
  3. Humidity:
    • Many house plants thrive in higher humidity levels. Consider using a humidifier or placing a tray of water near your plants to increase humidity.
  4. Regular Feeding:
    • In addition to eggshell fertilizer, feed your plants with a balanced, water-soluble fertilizer during the growing season to ensure they receive all necessary nutrients.

Conclusion

Using eggshells as a natural fertilizer is an easy, cost-effective way to help your house plants flourish continuously. By incorporating this simple practice into your plant care routine, you can provide essential nutrients, improve soil health, and promote robust growth. Say goodbye to chemical fertilizers and hello to vibrant, thriving house plants with the help of this natural, eco-friendly solution.

Rice is a real miracle for orchids: if it hasn’t flowered for a long time, take 50 grams and try this trick, and the first buds will soon appear!🌱

Rice is a real miracle for orchids: if it hasn’t flowered for a long time, take 50 grams and try this trick, and the first buds will soon appear!🌱

Are you frustrated with your orchids’ lack of blooming despite your best efforts? Don’t despair just yet! There might be a simple, natural solution waiting in your kitchen pantry: rice. Yes, you read that right – rice, the humble grain that sustains millions worldwide, could be the secret to coaxing those elusive blooms out of your orchids. Let’s delve into this intriguing phenomenon and learn how to harness the power of rice to transform your orchid’s blooming potential.

Orchids, with their exquisite beauty and delicate allure, captivate the hearts of plant enthusiasts worldwide. Yet, coaxing these botanical gems to flower can sometimes feel like an elusive quest. Despite providing optimal care – the right light, water, and nutrients – some orchids stubbornly refuse to bloom, leaving their caretakers baffled and disheartened.

Enter rice, the unexpected hero in the quest for orchid blooms. The concept is simple yet surprisingly effective: by incorporating rice into your orchid care routine, you can stimulate flowering and encourage your orchid to reveal its full splendor.

Here’s how to put this ingenious trick into practice:

  1. The Rice Soak: Begin by soaking approximately 50 grams of rice in water for several hours or overnight. This soaking period allows the rice grains to absorb moisture and swell, releasing beneficial compounds into the water.
  2. Rice Water Infusion: Once the rice has soaked, strain the water into a container, discarding the rice grains. This rice-infused water is now a potent elixir for your orchids, rich in nutrients and growth-promoting substances.
  3. Application: Carefully water your orchids with the rice-infused water, ensuring that the roots and growing medium are thoroughly moistened. The nutrients present in the rice water will be absorbed by the orchid’s roots, providing a boost to its overall health and vitality.
  4. Observation and Patience: After applying the rice water, observe your orchids closely for signs of new growth and budding. With consistent care and patience, you should soon witness the emergence of the first buds, heralding the imminent arrival of beautiful orchid blooms.

But why does this seemingly unconventional method work? The secret lies in the composition of rice and its ability to release beneficial nutrients and growth stimulants when soaked in water. Rice contains various vitamins, minerals, and amino acids that promote plant growth and flowering, making it an ideal natural fertilizer for orchids.

Furthermore, the rice water infusion provides a gentle yet effective way to deliver these nutrients directly to the orchid’s roots, ensuring maximum absorption and utilization by the plant.

In conclusion, rice truly proves itself to be a miraculous ally in the quest to unlock the blooming potential of orchids. By incorporating this simple yet effective trick into your orchid care routine, you can rejuvenate dormant plants, stimulate flowering, and revel in the breathtaking beauty of your orchid collection.

So, the next time your orchids seem reluctant to bloom, don’t despair – reach for the rice and witness the magic unfold before your eyes. With a little patience and a sprinkle of nature’s wisdom, your orchids will soon reward you with a spectacular display of blossoms, transforming your space into a botanical paradise.

How To Plant Roses To Have Perfect Flower🌱

Roses are undoubtedly among the most beautiful and appreciated  flowers, capable of embellishing our balconies and gardens with different colors and giving a touch of elegance. To have beautiful and healthy roses , however, particular precautions must be followed.


Once you have chosen one of the hundreds of varieties and colors of roses, you need to start worrying about their cultivation, and to do so you need to take into account many different factors.

Potted roses can be planted all year round, as long as they are not placed in places subject to frost. If you decide to grow them outdoors, the best time of year is autumn, when the soil is still warm and facilitates the formation of roots.


    1. Roses prefer ventilated but not windy locations, and it is recommended not to  plant them closer than 30 centimeters from walls or walls which can contribute to drying the air around them.
    2. The soil should be slightly clayey and not too sandy, to be able to be enriched with specific nutrients or compost.
    3. To stimulate the growth of the plant and reduce the damage caused by frosts, it is suggested to cover the soil with leaves or dung directly at the time of cultivation.


    1. Before planting roses, place them in a bucket of water overnight.
    2. Mix the soil well and make a hole large enough to plant the rose and allow its roots to grow and spread properly.
    3. Plant the rose at such a depth that the graft (i.e. the knotty part from which the branches emerge) is about 5 centimeters below the ground.


  1. Water thoroughly after planting the rose.

Choose a compost or fertilizer rich in magnesium and potassium, but low in nitrogen. Reduce the amount of fertilizer after the first few weeks, otherwise the shoots will grow too quickly and will not resist winter frosts.

By following these suggestions, our balconies or gardens will have colorful and beautiful roses throughout the spring.

How to Grow Avocados in Containers🌱

6 Tips For Growing Avocado In A Pot And Getting It To Fruit🌱

If you’ve ever tried sprouting an  avocado seed at home, you know how challenging it can be to get a  plant. Although it’s a somewhat lengthy process, growing avocado at home like any other plant is indeed possible.


The avocado tree thrives in warmer areas, as it needs heat to grow properly. However, it can be cultivated even in colder zones if protected from cold and frost.


Here are the basic care tips for cultivating an avocado plant in a pot to ensure it grows healthy and strong.


1. Proper Germination


Thoroughly clean the avocado seed and pierce it with four toothpicks, allowing it to sit in water with the pointed end facing upward. Change the water once a week to prevent rot.


The seed will take about three weeks to sprout. The ideal time for growing avocados is spring. Once the first leaves appear, it’s ready to be planted in a pot.


2. Pot Size


In areas where the temperature often drops below 10°C, it’s recommended to plant avocados in a pot that can be kept indoors. Avocado is very susceptible to cold.


3. Ideal Soil

Avocado needs acidic soil with a pH from 5 to 7. The ideal mix comprises equal parts peat, coconut fiber, and worm humus. Finally, add a handful of perlite to ensure proper soil aeration.


4. Basic Care

    • Cold: Move the plant indoors and place it near a window to ensure the right amount of light. If you decide to keep it outside, cover it with a thermal sheet.
    • Warm: Use a shade cloth to provide shade and prevent the sun from scorching the delicate leaves.
    • Watering: The pot must have good drainage. If water is lacking, the leaves will show brown spots on the tips.


5. Fertilization

Add fertilizer during the warmer periods of the year, i.e., when the plant develops and forms shoots.

You can use the same worm humus you used for the soil mix. Just place it on the pot’s surface.


6. First Pruning

After about a year, the avocado will reach a height of about 60 centimeters. It’s advisable to trim the ends to facilitate branching and prevent it from growing in one direction.


How to graft a rose into another variety: the trick finally revealed🌱

How To Graft A Rose Into Another Variety: The Trick Finally Reveal🌱


Grafting a rose may seem like a task reserved for professionals, but the truth is that anyone can master the process with a few essential steps.

While it’s not a straightforward action, understanding the key procedures can lead to the gratifying sight of diverse  flowers blooming naturally, saving you from purchasing additional varieties and valuable time.

Grafting a Rose: Incorporating Other Varieties

Grafting a rose with other varieties requires attention to specific procedures, but the rewards are well worth the effort. The process involves uniting two  plants of distinct varieties to create a unique and exceptional plant.


roses and gardening

1. Selection of Rootstock:


    • Choose a robust rootstock, which is pivotal for the success of the grafting process. A dog rose paired with a multiflora rose is a recommended combination, especially for beginners.
    • Dog roses exhibit sturdy roots and adapt well to various soils, making them an ideal rootstock. Multiflora roses possess shallow roots that complement this type of addition.


  • Obtain the rootstock either by planting seeds from the chosen varieties or by using cuttings. Take two branches of approximately twenty centimeters in length during winter and plant them in summer to cultivate your seedling.
graft a rose

2.Tools and Preparations:

    • Gather essential tools, including disinfected scissors and ligature materials, before initiating the grafting process.


  • Ensure the outdoor temperature is around 25 degrees Celsius before proceeding with the grafting.

3. Grafting Procedure:


    • Begin by cutting the branch, aiming for a perpendicular cut rather than a clean one. Prior to cutting, remove leaves and thorns for better working conditions.


  • Attach the detached portion to the rootstock and secure it using raffia or another lightweight material to cover the cut.
  • After about a month, inspect the result by removing the raffia to assess the rooting status.

4. Key Operations:


  • In February, cut the rootstock at the grafting point during the initial month. In spring, observe the emergence of the first shoot, allowing it to reach approximately fifteen centimeters.
  • Trim the shoot and eliminate wild growth around the structure.

5. Seek Professional Advice


  • Consult a professional nurseryman for guidance, as not all roses are suitable for grafting procedures. Their expertise can provide valuable insights into selecting compatible varieties and ensuring successful outcomes.

By following these steps and seeking professional advice when needed, you can master the art of grafting roses and enjoy the beauty of a truly unique and diverse garden.

The method of growing roses from Cuttings the whole world does not know🌱

Growing Your Own Roses From Cuttings: A Step By Step Guid

Roses are timeless symbols of beauty and romance, admired for their stunning blooms and intoxicating fragrance. If you’ve ever dreamed of cultivating your own rose garden, you’ll be delighted to learn that you can easily grow roses from cuttings right in the comfort of your home. In this guide, we’ll walk you through the process, making it simple and accessible for all aspiring gardeners.


Step 1: Selecting Your Rose Cuttings

    • Choose healthy, disease-free rose stems for propagation. Look for stems that are green and firm, preferably with several leaf nodes.


  • Opt for semi-hardwood cuttings, which are taken from the current season’s growth and are more likely to root successfully.

Step 2: Preparing the Cuttings

    • Using sharp, clean pruning shears, cut a 6-8 inch stem from a healthy rose bush at a 45-degree angle, just below a leaf node.


  • Remove any  flowers or buds from the stem, as they can divert energy away from root development.
  • Trim the stem to remove any excess leaves, leaving only 2-3 leaves at the top.

Step 3: Rooting Hormone (Optional)


  • Dip the cut end of each rose cutting into a rooting hormone powder or gel, which can help stimulate root growth and increase the chances of successful propagation. This step is optional but can improve results, especially for difficult-to-root varieties.

Step 4: Planting the Cuttings

    • Fill small pots or containers with a well-draining potting mix or a mixture of perlite and peat moss.


  • Make a hole in the soil with a pencil or stick, then insert the prepared rose cuttings into the hole, burying them about halfway deep.
  • Firmly press the soil around the base of each cutting to ensure good contact and stability.

Step 5: Providing Ideal Growing Conditions


    • Place the pots in a warm, bright location with indirect sunlight. Avoid placing them in direct sunlight, as this can cause the soil to dry out too quickly.
    • Keep the soil consistently moist but not waterlogged. Use a spray bottle or watering can to water the cuttings gently, ensuring that the soil remains damp.
    • Consider covering the pots with a clear plastic bag or plastic wrap to create a mini greenhouse effect, which helps retain moisture and create a humid environment conducive to root development.


Step 6: Monitoring and Patience

    • Check the cuttings regularly for signs of new growth, such as emerging leaves or roots. This process can take several weeks to several months, so be patient and continue to provide care and attention.
    • Once the cuttings have developed a healthy root system and new growth, they can be transplanted into larger pots or directly into the garden.


With proper care and patience, you’ll soon be rewarded with a collection of beautiful rose bushes grown from cuttings, ready to adorn your garden with their breathtaking blooms and enchanting fragrance. So why not give it a try and embark on your own rose-growing adventure? Happy gardening!