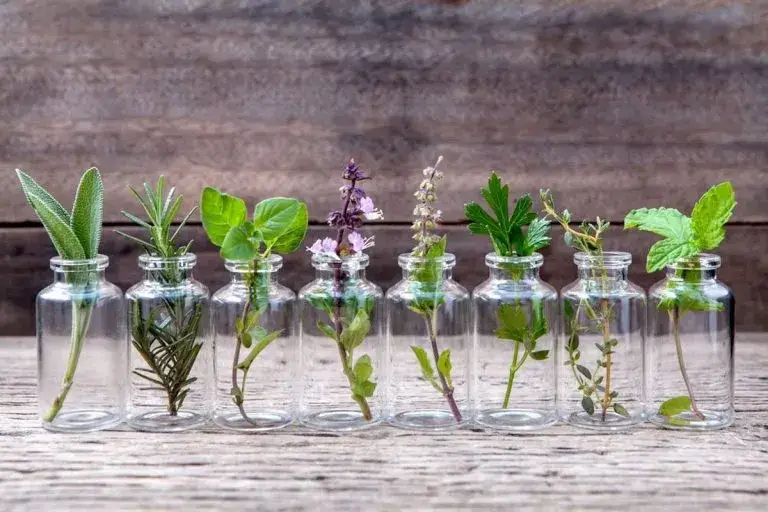
10 Veggies and Herbs You Can Grow in Just a Glass of Water🌱

Nurturing herbs and veggies in one’s own space provides both utility and aesthetic appeal. Intriguingly, numerous plants can initiate their life cycles in water, making traditional pots or soil unnecessary in the early stages.

This propagation technique is a neat and simple avenue to observe a plant’s full life spectrum, from the parts we see above ground to the intriguing roots that typically remain concealed beneath the earth.

Let’s delve into a selection of herbs and veggies that thrive in watery environs:

1. Basil:
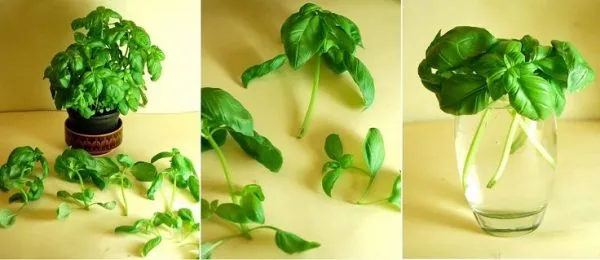
This aromatic gem, cherished in dishes like pasta, can sprout life in a water-filled vessel. Snip stems around 10 cm and immerse them in water. When roots extend to about 5 cm, it’s time to move the basil to soil.

2. Oregano:
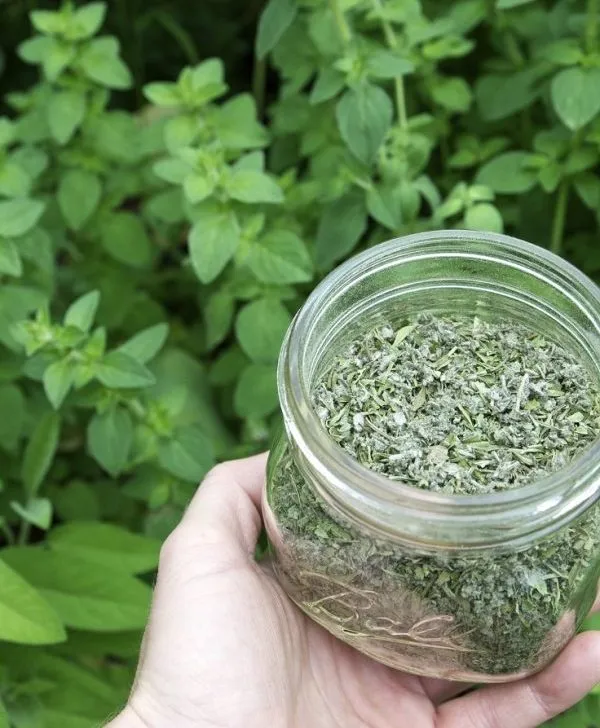
Propagate this herb in water by taking cuttings and ensuring a warm, sunlit environment of about 18-21°C. Remember, oregano nurtured in containers may be more susceptible to cold than its ground counterparts.

3. Rosemary:
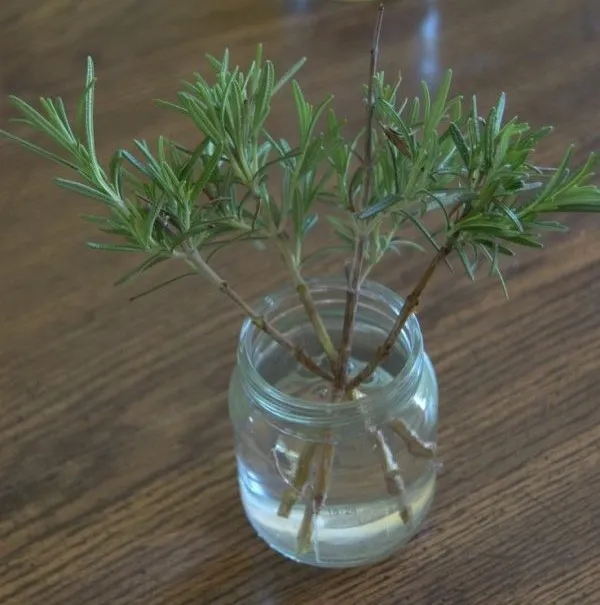
By submerging 15 cm stems in water and retaining just the topmost leaves, you’re on the path to growing rosemary. You’ll witness roots in a fortnight or so, post which they can be transferred to your garden.

4. Parsley:
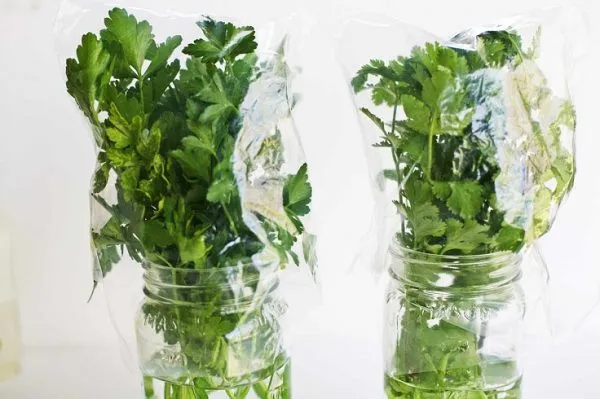
This ubiquitous kitchen green thrives in water. After placing cuttings in a water vessel and refreshing it periodically, they can be shifted to soil once the roots are well-formed.

5. Mint:
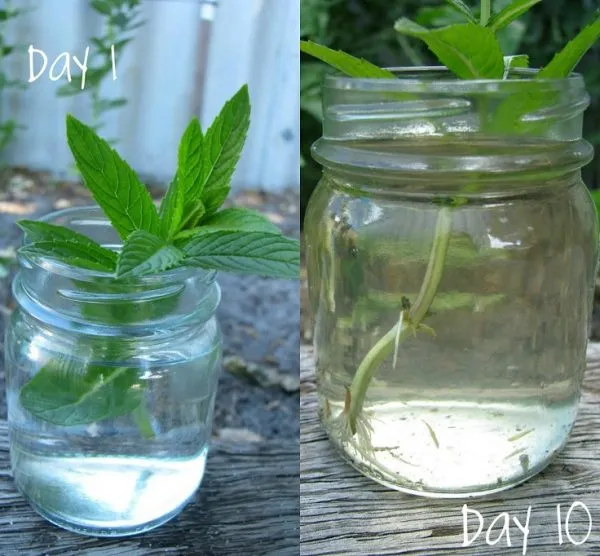
Mint, with its dynamic growth, especially in warmer months, can be initiated in a water-filled glass by a sunlit window. While summer might see quick root formations, winter could take a tad longer.

6. Balm:
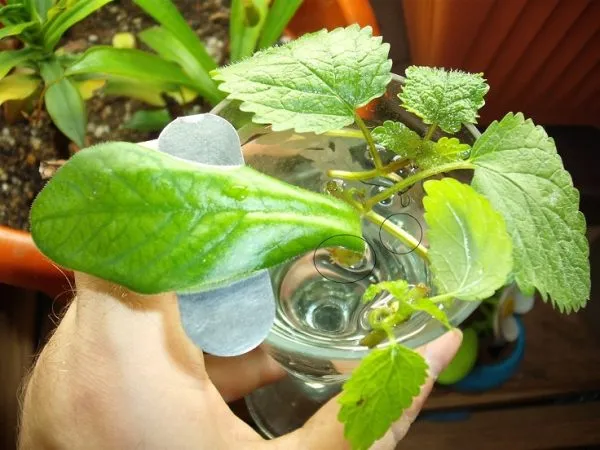
For lemon balm, snip 5-7.5 cm stems and ensure they’re exposed to ample sunlight. Regular water replacements are key to their growth.

7. Stevia:
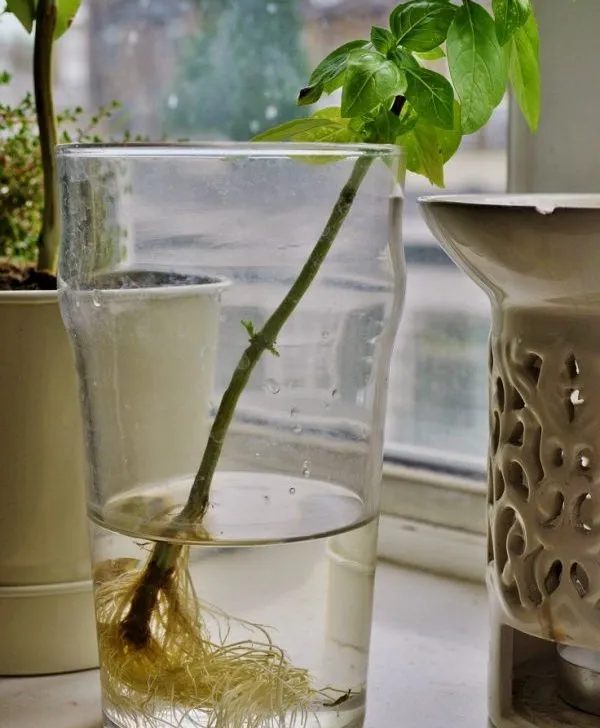
Begin your sweet journey with stevia by rooting it in water. Once firmly rooted, transplant it, and soon you’ll have a natural sweetener on hand.

8. Lettuce:
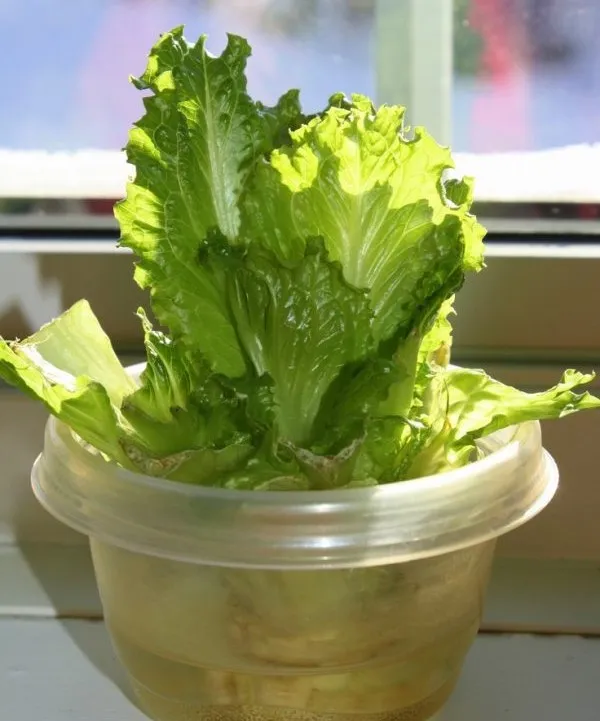
Give purchased lettuce a second life. Place its stem in a shallow water dish under sunlight, and soon you’ll spot baby leaves, albeit smaller than the original.

9. Celery:
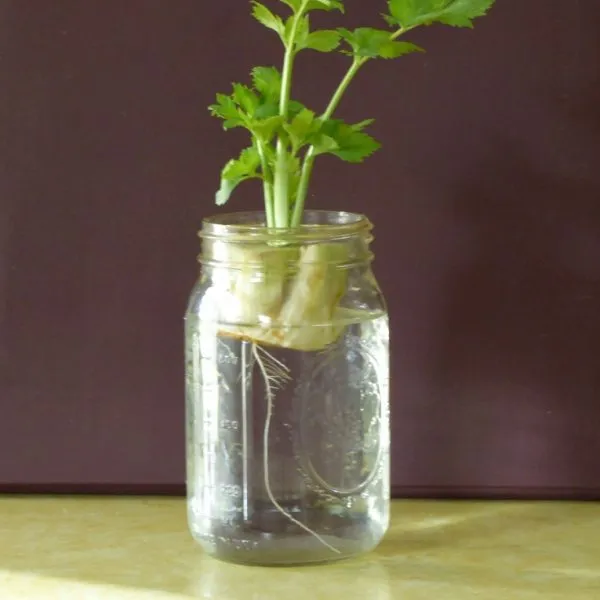
Much like lettuce, rejuvenate celery by immersing its stem in water. With daily water changes, it’ll be ready for soil within a week.

10. Spinach:
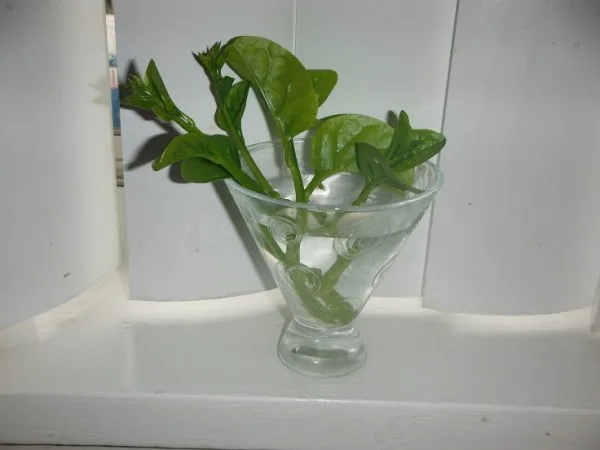
With spinach stems, some water, and a root booster, you’re set. In about ten days, you’ll have rooted spinach ready for transplantation.

Dabbling in water propagation doesn’t just provide a front-row seat to plant growth but also lets you enhance your green indoor space sans extra pots or soil. So, with a few cuttings and some water, set off on this eco-friendly, efficient gardening adventure.

Cultivating Kiwi in Containers: Your Ultimate Guide🌱

Often, the mere mention of ‘kiwi’ evokes visions of juicy, fragrant slices. But did you know that you can nurture these delectable fruits right at your home, specifically in containers? The thrilling reality is that it’s entirely possible! Dive into the world of potted kiwi cultivation with this guide.

Delving into Hardy Kiwis

Frequently found on supermarket shelves, hardy kiwis are a tinier counterpart of the typical kiwi. A captivating characteristic of these fruits is that they are dioecious, which implies you’ll need at least one male plant for every group of 8-10 females to guarantee fruit production.

For novices, the Ananasnaya kiwi variety is often suggested due to its sturdy growth and abundant small fragrant fruits. The Geneva strain is ideal for early yields, while the Dumbarton Oaks is celebrated for its plentiful harvest. If larger fruits are your preference, especially in cooler climates like USDA Zone 5, consider the Michigan State variety. The Ken’s Red boasts a beautiful red hue, and the Issai variety stands out for its self-pollination feature, eliminating the need for both genders.

Starting Your Kiwi: Seeds or Stem Cuttings?

There are two primary ways to propagate kiwis: using seeds or stem cuttings. Regardless of the method, a touch of patience is required as the plant typically takes 3 to 5 years to bear its first fruit. While seeds are available from nurseries or online platforms, opting for cuttings often produces superior plants. And if fruiting vines are your goal, ensure you plant both male and female specimens.

Pro Tip: For a head start, you might want to buy a pre-potted kiwi plant from a nursery, ideally a variety that self-pollinates.

Choosing the Ideal Pot

Kickstart your kiwi cultivation in a pot ranging from 12-14 inches, equipped with adequate drainage openings. As the plant matures and outpaces its initial home in a few years, transition it to a more spacious container, ensuring the roots remain intact.

Sturdy Support is Key

With the potential to stretch up to 25-30 feet, kiwi vines demand reliable support. Guiding them to ascend a patio structure or setting up a robust trellis can be effective. Alternatively, spacious balconies or rooftops are also great locations for kiwi cultivation.

Essentials for Cultivating Potted Kiwis

Soil Composition

For prosperous growth, kiwi plants favor a blend of well-aerated soil that leans towards loam and contains a touch of organic additives like compost, decomposed leaves, or seasoned manure. The ideal pH spectrum ranges from slightly acidic to mildly alkaline. Soils that are overly clayey or too sandy should be avoided.
Preferred Setting

Healthy kiwi growth mandates a generous dose of sunlight, optimally spanning 5 to 6 hours daily.

Temperature Parameters

For chillier regions, temperatures oscillating between 40º-60º F (4.44º-15.56º C) are perfect. Conversely, for toastier climates, a bracket of 56º-77º F (13.33º-25º C) is suitable. It’s vital to note that young kiwi plants might suffer damage or perish in temperatures plummeting below 14º F (-10º C).

Hydration Needs

Consistent moisture in the soil propels optimal kiwi growth. However, drenching the soil or allowing the plant’s roots to wade in stagnant water may induce root decay.

Nutrient Supplements

Once the kiwi plants find their footing, periodic nutrient supplementation becomes imperative. Nevertheless, over-nourishing can jeopardize the fragile root system. Employing a well-balanced granular feed, like a 16-16-16 mix, 2-3 times annually as per the recommended dosage, usually suffices.

Tending to Your Kiwi Plant Trimming Practices

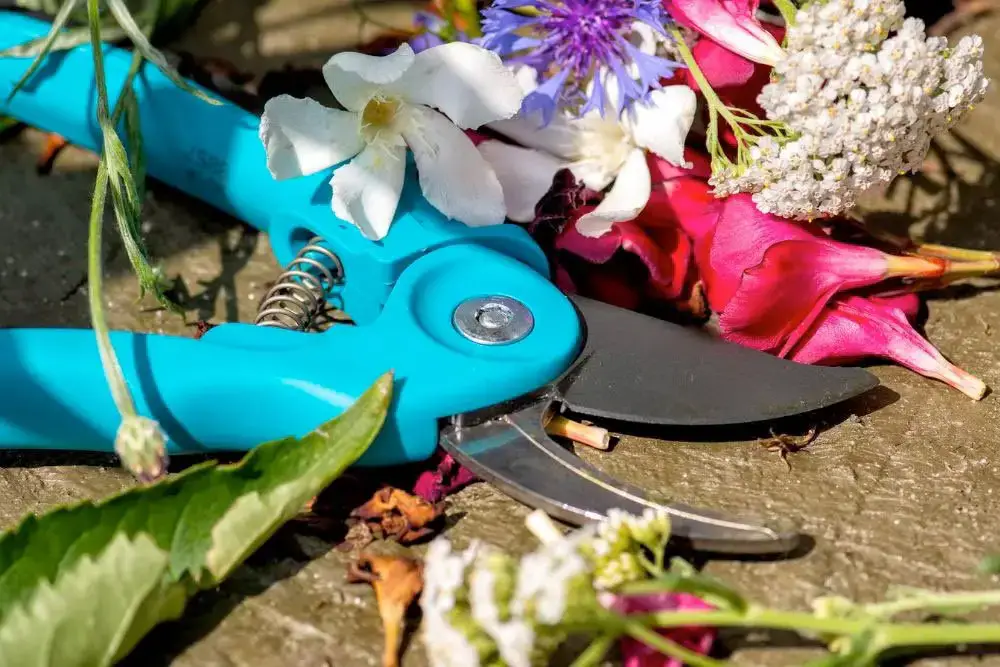
Yearly trimming of kiwi vines is a non-negotiable. The ideal pruning window for female specimens is the dormant winter phase, whereas male plants should be clipped post-flowering. Self-fertilizing variants also benefit from winter trims.

Soil Covering

To retain moisture in the soil, mulching is recommended. A concoction of compost or fragmented leaves is effective. However, ensure it’s not directly touching the vine’s base to avert potential rot.

Guarding Against Pests and Ailments

Kiwi plants are generally resilient against pests and maladies. Should any issues surface, a natural remedy like neem oil often resolves them. If furry friends, especially felines, roam your space, safeguard your plant.

Winter Care for Kiwis

Though full-grown kiwi plants can withstand a deep freeze of up to -15 F (-26 C), juvenile plants benefit from winter protection to enhance fruit caliber. When indoors, swaddle the vines with fabric while ensuring they still get a bit of sunlight.

Reaping and Preserving Kiwis

Seed-propagated kiwi plants usually commence fruit-bearing around their third year. Some strains, such as the Arctic, fruit sooner. Once in its prime, a kiwi vine can generously offer 40-50 pounds of fruit annually for nearly half a century!

A softening texture indicates fruit maturity. A taste test can confirm their readiness. Post-harvest, kiwis can be chilled for up to five weeks.

How to propagate and grow a Christmas Cactus (Schlumbergera)🌱

The Christmas cactus (Schlumbergera) is a popular indoor plant celebrated for its spectacular array of blooms in shades of red, white, pink, purple, and even yellow during the holiday season. This plant originates from the rainforests of Brazil, where it grows as an epiphyte, meaning it uses other plants for support but not nutrients. In this guide, we’ll learn how to propagate and grow this stunning plant to add a touch of festive beauty to your home or garden.

Propagation of the Christmas Cactus

1 20

Propagation is the process of creating new plants from the parent plant. Christmas cactus propagation can be achieved by taking cuttings. Follow these steps to successfully propagate your Christmas cactus:

Choose the Right Time: The best time to take a cutting is in spring, just after the blooming period.

Select the Segment: Choose a healthy-looking stem segment of 2-3 joined leaf sections. Ensure that the selected stem is mature – dark green, not brown or yellow.

Cut the Segment: Using a clean, sharp knife or scissors, make a clean cut between segments.

Let it Heal: Allow the cutting to dry for a few hours or overnight. This enables the cut to callus over and prevents rot when planted.

Plant the Cutting: Once the cut end is callused, plant the cutting in a small pot with well-draining soil, ideally a mix of half potting soil and half perlite or sand. Insert the end of the cutting about an inch into the soil.

Water Carefully: Water the cutting sparingly until it shows signs of growth. Overwatering can cause rot.

Wait for Rooting: Roots will typically form in 3-6 weeks. Once roots have established, you can treat the new plant like a mature Christmas cactus.

Caring for Your Christmas Cactus

2 21

To ensure the growth and flowering of your Christmas cactus, you’ll need to create an environment similar to the humid, shaded understorey of a tropical rainforest. Here are some important care tips:

Light: The Christmas cactus prefers bright, indirect light. Direct sunlight can scorch the leaves.

Water: This plant likes its soil to be consistently moist but not waterlogged. Overwatering can cause root rot. Water thoroughly when the top inch of soil feels dry to the touch.

Temperature: Ideal temperatures are between 60-70°F (15-21°C). It can tolerate lower temperatures but is not frost-tolerant.

Humidity: As a tropical plant, Christmas cactus prefers high humidity. If your home is dry, you can increase humidity by placing a tray of water near the plant or using a humidifier.

Fertilization: During the growing season (spring and summer), you can feed your Christmas cactus with a balanced, water-soluble fertilizer every 2-4 weeks. Do not fertilize during the plant’s rest period in fall and winter.

Pruning: Pruning in late spring, after blooming, can encourage the plant to branch out. Simply pinch off a few segments from each stem.

Flowering: To stimulate the Christmas cactus to bloom, it needs a period of cool temperatures (around 55°F or 12-13°C) and darkness (at least 13 hours a day) for about 6 weeks. After this period, increase light and temperature, and the plant should bloom.

Propagation and growing a Christmas cactus can be a rewarding horticultural experience, and with the right care, this gorgeous plant will brighten your holidays for many years to come. Happy planting!

How to Cultivate a Fragrant Rosemary Hedge and 10 Reasons Why It’s Worth Growing🌱


Rosemary (Rosmarinus officinalis) is a versatile and aromatic herb that can add both beauty and functionality to your garden. One creative way to incorporate rosemary into your landscape is by growing a rosemary hedge. In this article, we will explore the steps to successfully grow a rosemary hedge and delve into ten compelling reasons why you should consider adding this fragrant and beneficial plant to your outdoor space.

1. Choose the Right Location:

Shutterstock

Select a location for your rosemary hedge that receives at least six to eight hours of direct sunlight daily. Rosemary thrives in well-draining soil, so ensure the area has good drainage to prevent waterlogged roots.

2. Prepare the Soil:

Shutterstock

Before planting, amend the soil with organic matter like compost to improve its fertility and drainage. Remove any weeds or grass from the planting area.

3. Select Rosemary Varieties:

Choose rosemary varieties that are suitable for hedging, such as “Tuscan Blue,” “Arp,” or “Prostrate” rosemary. These varieties have a compact growth habit and can be easily shaped into a hedge.

4. Planting:

Dig a trench that is twice the width of the root ball and slightly deeper. Space the rosemary plants around 12 to 18 inches apart, depending on the desired density of your hedge. Gently place the plants in the trench, ensuring that the top of the root ball is level with the soil surface. Backfill the trench and firm the soil around the plants.

5. Watering:

After planting, water the rosemary hedge thoroughly and maintain consistent moisture for the first few weeks until the plants establish their root systems. Once established, rosemary is relatively drought-tolerant and requires watering only when the soil feels dry to the touch.

6. Pruning and Shaping:

shutterstock

Regular pruning is essential for maintaining the shape and density of the rosemary hedge. Prune the plants in early spring before new growth emerges and trim lightly throughout the growing season to encourage bushiness. Avoid cutting back into old wood, as rosemary has limited ability to regenerate from old growth.

4 Reasons Why It’s Worth Growing :

Fragrance and Aesthetic Appeal:

shutterstock

A rosemary hedge provides a fragrant and visually appealing addition to your garden. The aromatic scent of rosemary can uplift your spirits and create a pleasant atmosphere. Its dense foliage and evergreen nature offer year-round beauty and privacy.

Culinary Delights:

shutterstock

Having a rosemary hedge means you have a readily available source of fresh herbs for your culinary endeavors. Rosemary is a versatile herb that adds flavor and aroma to a wide range of dishes, including roasted vegetables, grilled meats, and savory bread.

Pollinator Haven:

Rosemary produces delicate, blue-purple flowers that attract bees, butterflies, and other pollinators to your garden. By growing a rosemary hedge, you contribute to supporting the local ecosystem and promoting biodiversity.

Medicinal and Health Benefits:

shutterstock

Rosemary is renowned for its medicinal properties and numerous health benefits. It contains antioxidants and compounds that have anti-inflammatory, antimicrobial, and cognitive-enhancing effects. Inhaling the scent of rosemary can also improve mood and mental clarity.

Growing a rosemary hedge not only adds aesthetic appeal to your garden but also offers culinary delights, attracts pollinators, and provides health benefits. With proper care and pruning, your rosemary hedge will flourish and become a delightful feature of your outdoor space. So, grab your gardening tools and embark on this fragrant journey of growing a rosemary hedge.

Growing Tomato Plant From Tomato Slice Time Lapse🌱

The Tomato Slice Experiment: Does it Really Sprout Seedlings?

Intrigued by some online videos and trending TikTok clips, I set out on a journey to debunk or confirm the claims: Can a mere slice of tomato sprout into seedlings? Some of my readers shared their successes and failures, and now it was my turn to try.

My Tomato Experiment

With a mix of hope and skepticism, I embarked on this botanical journey. Here’s the scientific scoop: for tomato seeds to sprout, they rely on a gel-like layer around them to degrade. This degradation process, which often happens naturally, enables germination.

For my experiment, I chose three tomato varieties: a Roma, a Beefsteak, and a cherry tomato. Ensuring a humid environment, I placed the potted slices near my clothes dryer.

Observations:

Week One:

The start was, frankly, boring. I kept my patience, watering the soil and waiting for some magic. However, by day five, mold began to form, specifically around where I had buried the tomato slices.

This was the pivotal moment: success or just a stinky mess?

Week Two:

The mold persisted but didn’t spread further, a silver lining, perhaps. Feeling slightly discouraged, I took a weekend break.

But guess what? Upon my return, I was greeted by tiny green offshoots!

The only exception was the cherry tomato slice, which remained dormant.

Week Three:

Shifting the pot to my grow light setup, I observed more sprouts emerging, but the cherry tomato continued to play hard to get.

However, perseverance pays off. Eventually, sprouts emerged from the cherry tomato slice spot.

Results:

Yes, the method works! Tomato slices can indeed be germinated to sprout seedlings. But there’s a catch…

The Tomato Slice Catch:

Starting with a supermarket tomato? Here’s where things get dicey. Such tomatoes are typically hybrids, a product of selective breeding for desired traits. The downside? Hybrids don’t yield consistent progenies. Meaning, if you plant seeds from a hybrid tomato, the resulting plants can be unpredictable.

In layman’s terms, using seeds from hybrids can lead to tomatoes that might not resemble the parent plant. If you’re particular about growing a specific variety, this might not be the way for you. On the other hand, if you’re feeling adventurous, you might just discover a new favorite!

However, do remember, open-pollinated tomato varieties – the kind that reliably reproduces its traits – are rarely found in regular supermarkets.

Give it a Go!

Regardless of the unpredictability, there’s undeniable joy in watching those seedlings emerge. And who knows? You might just cultivate a unique variety of tomato, one with its own distinct flavor profile!

Pro Tips:

  • Initiate the experiment at least 10-12 weeks before you wish to transplant the seedlings outdoors.
  • Ensure your tomato slices are kept warm and damp. Creating a mini greenhouse effect with plastic wrap might help.
  • When your seedlings finally emerge, replant them deep to develop a robust root system, preparing them for the outdoors.

Why You Shouldn’t Kill Purslane in Your Garden: 8 Compelling Reasons🌱

Purslane (Verdolaga) is no longer a garden menace but a valuable gem! This remarkable plant is reclaiming its place in farmer’s markets and prestigious restaurants, offering both health benefits and culinary delight.

Known by various names such as hogweed and pigweed, Purslane is a weed you’ll want to embrace. Regarded as a superfood, it holds a special place in the heart of even Mahatma Gandhi and is now experiencing a resurgence.

This resilient plant emerges from pavement cracks, infiltrates gardens, and is hailed as a “miracle plant” by Dr. Artemis Simopoulos, the president of the Centre for Genetics, Nutrition, and Health. During her tenure at the National Institutes of Health, Dr. Simopoulos discovered that Purslane contains the highest levels of Omega-3 fatty acids among all green plants.

Its teardrop-shaped succulent leaves are abundant in antioxidants, vitamins, and minerals, making it a nutritious powerhouse. But that’s not all—these leaves also offer a refreshing and tangy lemon flavor with a hint of peppery kick, as described by Sergio Vitale, the chef-owner of Aldo’s Ristorante Italiano in Chicago, who grew up enjoying Purslane in southern Italy.

Although early Americans, including Martha Washington, relished Purslane both raw and pickled, its usage dwindled in the early 1900s. Fortunately, in recent years, farmers, foragers, and innovative chefs have rekindled their interest in this beneficial weed.

When preparing wild Purslane, it’s crucial to wash the plant meticulously to eliminate any pesticide residue. With its tart and slightly salty taste, Purslane makes an excellent addition to salads and various dishes.

Additionally, here’s a simple recipe to try: Purslane and Basil Pesto.

Ingredients:

  • 2 cups young Purslane leaves and stems, rinsed and roughly chopped
  • 45g basil leaves, rinsed
  • 1 clove garlic
  • 45g toasted almonds
  • Juice from half a lemon
  • 50ml olive oil
  • Salt and pepper to taste

Instructions:

  1. Combine Purslane, basil, garlic, almonds, and lemon juice in a food processor.
  2. Pulse until well combined.
  3. While the processor is running, slowly stream in olive oil until the mixture emulsifies.
  4. Season with salt and pepper to taste.
  5. Enjoy this flavorful pesto on a toasted sandwich, roasted vegetables, meat, or tossed with pasta.

Now, let’s explore the nutritional benefits of Purslane:

  1. Omega-3 Fatty Acids: Purslane stands out as an exceptional plant-based source of these essential fatty acids, crucial for brain and heart health, especially for vegans.
  2. Antioxidants: Loaded with antioxidants like glutathione, Purslane helps protect cells, combat damage, and slow down the aging process.
  3. Minerals: With notable amounts of calcium, magnesium, potassium, iron, phosphorus, manganese, copper, folate, and selenium, Purslane fills the gaps in the Standard American Diet and supports overall well-being.
  4. Vitamin C: A significant source of this immune-boosting vitamin, which aids in maintaining a strong and resilient immune system.
  5. Beta-carotene: Abundant in Purslane, beta-carotene serves as a precursor to vitamin A, addressing the deficiency commonly found in many individuals.
  6. Melatonin: Unlike most plants, Purslane contains melatonin, a hormone crucial for regulating sleep patterns, making it a valuable natural source.
  7. Cholesterol Reduction: Thanks to betalain, an antioxidant present in Purslane, it helps prevent cholesterol damage to blood vesselsand has a positive impact on LDL cholesterol levels.
  8. Tryptophan: Purslane contains tryptophan, an important amino acid that aids in mood regulation and combats depression.

Embrace the wonders of Purslane and experience its medicinal and culinary benefits. From its Omega-3 richness to its melatonin content, this versatile plant has much to offer for your well-being and taste buds alike.

Propagating Rose Cuttings Using the Potato Method🌱

If you’re eager to embark on a gardening journey but hesitant about investing in specialized equipment or seed-starting resources, fear not! Creating a stunning rose garden doesn’t have to break the bank. In fact, there’s a fun and alternative method to propagate rose cuttings using potatoes. With just a few simple materials and a dash of patience, you can turn your gardening dreams into reality.

Ready to infuse your life with some greenery? Let’s explore how to grow roses in potatoes and discover the satisfaction of nurturing your very own blossoming garden!

What You’ll Need:

To successfully grow rose cuttings in potatoes, gather the following supplies:

  • Rose cuttings, approximately 6 to 8 inches long
  • Jars
  • Labels
  • Clean pruning shears
  • Rooting hormone
  • Red or white potatoes (large enough to accommodate 1/2 inch of a rose stem)
  • Drill or screwdriver
  • Large 5-gallon pot (optional)

Step-by-Step Guide on Growing Rose Cuttings in Potatoes:

Growing rose cuttings in potatoes is a simple and enjoyable method that sets the stage for an enchanting collection of rose bushes in your backyard. Follow these steps to bring your vision to life:

Step 1 – Cut the Stems:

Begin by selecting two or three of the healthiest and longest stems from a rose bush. You can acquire cuttings from a florist or kindly request them from a neighbor. Trim the stems to be approximately 6 to 8 inches long, removing any leaves from the bottom half. Place the stems in clean jars filled with water to keep them hydrated while you prepare the potatoes for planting. To differentiate between different types of roses, label each jar accordingly. Once your stem cuttings are prepared, proceed to step two.

Step 2 – Cutting and Rooting Hormone:

With your rose cuttings ready, it’s time to make precise cuts. Trim approximately half an inch from the bottom of each rose cutting. Next, gently score the sides of the cane (rose stem) near the bottom to remove a small outer layer, allowing the rooting hormone to adhere more effectively. Finally, dip the end of the cutting into the rooting hormone compound. This boost of hormone ensures successful rooting and establishment in their new potato homes.

Now that you’ve completed these steps, it’s time to move on to planting them in their potato beds.

Step 3 – Insert Into Potato:

Prepare the potato for your rose cutting by using a screwdriver or drill bit slightly smaller than the diameter of the stem. Pierce the center of the potato with the tool. Carefully place the prepared rose cutting into the hole, ensuring it fits snugly but not completely through the potato.

Step 4 – Planting and Care Tips:

With the rose cutting securely nestled in the potato, it’s time to proceed with planting. Plant the potato in the soil, ensuring it is at least 3 inches deep. Gently tamp the soil around the potato to secure it in place. To provide protection from extreme temperatures and maintain the necessary humidity, place a jar over the planted cutting. Keep the cover in place until the roots have taken hold.

Monitor soil moisture, ensuring it remains adequately hydrated without drying out too quickly. If you have limited garden space, consider planting your cuttings in a 5-gallon pot and covering it with a plastic bag.

Regularly water your rose cuttings and observe for signs of growth. Within approximately a month, your roses will establish roots, signaling successful propagation.

Pros and Cons of the Potato Method:

Growing rose cuttings in potatoes is an intriguing and unconventional approach with its own advantages and considerations.

Pros:

  • The potato provides moisture, which is beneficial for the rose cutting’s root development, particularly during dry or arid conditions.
  • Potatoes are readily available and cost-effective, offering savings on gardening expenses.
  • Nutrients from the nutrient-rich soil surrounding the potato are absorbed by the potato and subsequently transferred to the cutting’s developing roots, ensuring adequate nutrition.

Cons:

  • There is a risk of sprouting or rotting potatoes if planted, making this method less reliable.
  • Excessive moisture in and around the potato while submerged in the ground can lead to rotting. This may attract animals, posing a threat to the cuttings.
  • If you adequately hydrate the soil during planting and reside in a moderate climate, the potato method may be unnecessary.

Potatoes Can Cultivate Beautiful Blooms:

And there you have it! A straightforward approach to growing roses from cuttings using potatoes. Pay close attention to the details and closely monitor the progress of your plants. Soon enough, you’ll be rewarded with healthy and magnificent roses blooming in all their glory.

Now that you’ve acquired this new skill, showcase it proudly! Share this valuable information with your family and friends. If you have any questions, feel free to leave them in the comments below. Thank you for reading, and may your gardening endeavors be filled with joy and success!

7 Hydroponic Plants Flourish Without Soil, Blooming Directly in Water🌱  


Searching for a distinctive method to incorporate some foliage into your home or workplace? Try cultivating plants hydroponically! Not only is this an attractive and effortless choice, it’s also an excellent way to upcycle resources. This article will delve into seven varieties of plants that flourish and blossom in aquatic conditions, negating the need for soil. We’ll examine an array of plants from Lucky Bamboo to Water Lilies, Pothos, Philodendrons, Spider Plants, Peace Lilies, and Chinese Evergreens, promising a fit for every environment. Let’s dive deeper into these water-loving plants and their care needs.

Lucky Bamboo:

Regarded as a charm of fortune and prosperity, Lucky Bamboo is a favorite choice for indoor flora. It thrives in aquatic environments and is easily propagated by clipping the stems and immersing them in a water-filled vase or jar. This plant favors bright, indirect sunlight, and is best kept away from direct sunlight.

Water Lily:

Characterized by their vivid, eye-catching blossoms, Water Lilies are an enchanting aquatic plant. They can easily be cultivated in a pond or sizable water container, needing a mix of full sun and partial shade. Regular fertilization is crucial to maintain their vitality.

Pothos:

Pothos, a minimal-care houseplant, can be successfully grown in water. Its long vines with heart-shaped leaves add a vibrant green touch to any space. Propagation involves simply clipping a stem and situating it in a water-filled vase or jar.

Philodendron:

Philodendrons, another favorite houseplant for hydroponic growth, boast large, glossy leaves. Their propagation mirrors that of Pothos. Like most houseplants, they appreciate bright, indirect light and need protection from direct sunlight.

Spider Plant:

Spider Plants, identified by their long, slender leaves and petite white flowers, are simple to care for and can be grown hydroponically. Simply immerse the plant in a water-filled vase or jar. They thrive best under bright, indirect sunlight, away from direct sunlight.

Peace Lily:

Peace Lilies, another popular choice for hydroponic growth, display glossy, dark green leaves and white blossoms that bloom in spring and summer. Like their counterparts, they appreciate bright, indirect light and need protection from direct sunlight.

Chinese Evergreen:

Chinese Evergreens, an effortless-care houseplant, flourish in water. Their dark green leaves with silver or white accents are perfect for a color splash in any space. Bright, indirect sunlight is preferred, with avoidance of direct sun.

There’s a wide array of attractive, low-maintenance plants that can blossom hydroponically. Whether your preference leans toward Lucky Bamboo, Water Lilies, Pothos, Philodendrons, Spider Plants, Peace Lilies, or Chinese Evergreens, there’s a water-loving plant for every home or office. Just ensure to provide appropriate light, keep the water pure, and fertilize regularly for a healthy growth cycle.

Just 1 tablespoon and the aphids are gone forever! Natural repellent🌱

Gardening enthusiasts often seek organic methods to protect their plants from pests. One such effective and natural method involves using hot peppers. This article explores how hot peppers can deter pests and enhance the health of your garden.

The Power of Hot Peppers

Hot peppers are not only a culinary delight but also a powerful tool in organic gardening. Their natural properties can help deter a variety of pests, ensuring a healthier garden with less reliance on chemical pesticides.

How Hot Peppers Deter Pests

Capsaicin: The Active Ingredient

The key component in hot peppers that deters pests is capsaicin. This compound is responsible for the heat in peppers and acts as an irritant to many insects and animals.

Types of Pests Deterred

Insects: Aphids, beetles, and spider mites are less likely to infest plants surrounded by hot peppers.

Animals: Larger pests like rabbits and deer often avoid plants treated with hot pepper solutions due to the irritation caused by capsaicin.

Preparing Hot Pepper Spray

Ingredients Needed

  • Fresh or dried hot peppers
  • Water
  • Dish soap (optional)

Steps to Prepare

Blend Peppers

Blend a handful of hot peppers with two cups of water until smooth.

Strain Mixture

Strain the mixture to remove solid particles.

Dilute and Add Soap

Dilute the pepper solution with one gallon of water. Add a few drops of dish soap to help the solution adhere to plant surfaces.

Application Methods

Foliar Spray

How to Apply: Spray the hot pepper solution directly onto the leaves of plants.

Frequency: Apply once a week or after heavy rain to maintain effectiveness.

Soil Drench

How to Apply: Pour the solution around the base of the plants.

Benefits: Helps deter soil-dwelling pests and strengthens the plant’s resistance.

Benefits of Using Hot Peppers in Your Garden

Eco-Friendly: Reduces the need for chemical pesticides, promoting a healthier environment.

Cost-Effective: Utilizes readily available ingredients.

Multi-Purpose: Acts as a deterrent for a wide range of pests.

Conclusion: A Healthier Garden Naturally

Incorporating hot peppers into your pest control routine is a simple and effective way to protect your garden organically. By using hot peppers, you can enjoy a vibrant and pest-free garden while contributing to environmental sustainability.

Embrace the power of hot peppers and transform your gardening experience with this natural pest deterrent.

How to propagate roses from cuttings🌱

Do you have a plant that thrives splendidly in your backyard? Or perhaps a neighbor’s rose bush that’s stolen your heart? Maybe a favorite rose nearing its twilight years?

This is the ideal time for a cutting.

By utilizing stem cutting propagation, you can clone your beloved plant. It’s a way to multiply that splendid floribunda you can’t help but adore.

However, here’s the not-so-good news: Your success rate is likely to be between 50 and 75 percent.

Rose enthusiasts are perpetually experimenting with techniques to boost the odds of their cuttings flourishing, and we can leverage their efforts and insights. However, even the most skilled rose cultivators often grapple with this success rate.

Don’t lose heart! This merely implies you might want to plant a few additional cuttings to ensure you get your desired number. If more sprout than anticipated, they can make beautiful presents.

Moreover, with this guide, you’re bound to be closer to the higher end of the success rate spectrum. We’ve compiled the finest advice and experiences from rose growers across the globe.

What’s next:

Is it wrong to feel thrilled about getting my hands soiled? If so, I wouldn’t want to be correct. Let’s get started!


Optimal Time for Cuttings

A swift online search will yield a multitude of websites suggesting late winter or early spring as the best time to take cuttings.

Some advocate summer, others swear by fall, and yet others insist that fall is the worst time.

To put it simply, there’s a plethora of conflicting advice out there! The reality is that the best timing depends on factors such as your location, climate, objectives, and situation.

While you can theoretically root starts during the growth season, the highest success rate will occur under mild, either cool or warm, conditions.

Cold, freezing weather is not conducive, and extreme heat, which can stress plants, is not ideal either. This leaves us with spring and fall in most temperate zones, as well as winter in regions where freezing is not a concern.

Numerous experts suggest taking cuttings in the fall, after the blossoms on your plant have withered. This method has been most successful for me, but remember that it necessitates keeping the starts indoors throughout the winter.


If you prefer to root your cuttings directly in the garden, do it in the spring after new growth has appeared. I find this method suitable when I don’t wish to invest the energy in maintaining a plant indoors for several months.

In my observation, rose cuttings initiated directly outdoors usually grow faster than those started indoors and subsequently transplanted.

Maybe it’s because they have more time to acclimate to your environment, and they don’t suffer the stress of being transplanted from indoors to outdoors.

Cuttings Preparation

Before you bring your knife near the plant, ensure the plant from which you’re taking the material is healthy. Avoid any plant displaying signs of rust, mildew, fungus, insect infestations, or other pests or diseases.

If you spot any of these issues on your plant, forget about taking a cutting.

Next, steer clear from old, woody stems or soft, extremely pliable material. Fresh new growth is often red or purple. A hint of red (or young) growth is acceptable, but the majority of the stem where you intend to cut should be green.


You can technically take cuttings from both hard and young growth, but these generally don’t root as effectively, in my experience.

If you’re taking cuttings in the fall, look for a stem with a faded flower or even the beginnings of a hip, having at least six sets of leaves.

Select an eight to nine-inch piece from an area with pencil-thick growth, using a clean, sharp knife or clippers. Make the cut at a 45-degree angle. Repeat as necessary.